How to Remove Moisture From Headlights and Tail Lights?
car&bike Team
1 min read
Feb 03, 2022, 05:23 PM

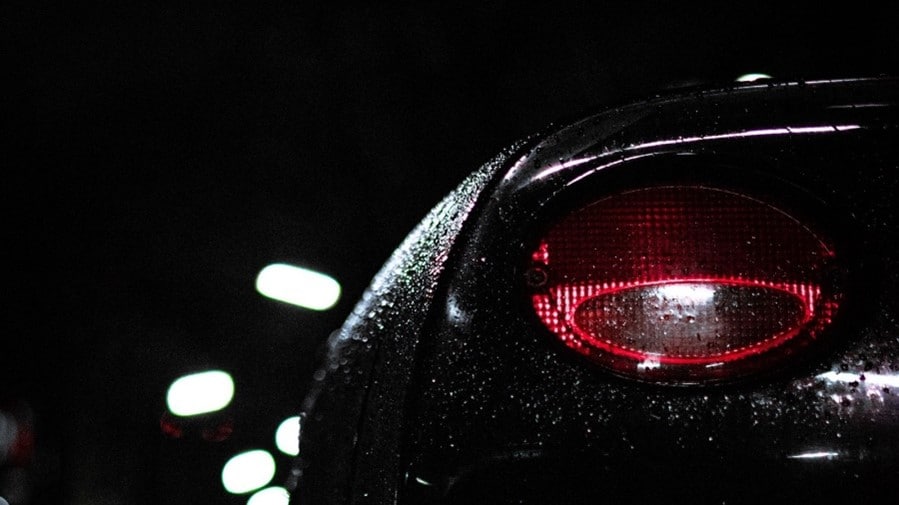
The moisture condenses pretty quickly on the headlights and taillights in high humidity areas. With water droplets on the vehicle lights, night-time driving becomes difficult and unsafe. Thankfully, this issue has a simple fix. This guide will walk you through how to remove moisture from headlights and taillights!

Photo Credit: unsplash.com
Removing Moisture from Headlights
Follow these five simple steps to clear the moisture from your car's headlights:
- Step 1: Disconnect the vehicle battery and unmount the headlight assembly. You use a ratchet to wrench out the screws.
- Step 2: Using a lint-free fabric, wipe the headlight parts. Make sure to perform this gently to avoid any scratches.
- Step 3: After wiping everything, stick silica gel inside the headlight assembly. Silica gel is a great tactic to wick off the moisture.
- Step 4: If you frequently face moisture on the headlights, apply fresh sealants. Remove the mask from the headlight and gently apply some glue.
- Step 5: Now, put back the headlight in its place and insert the screws. Use the ratchet again to secure the screws well.

Photo Credit: unsplash.com
Removing Moisture from Tailights
In these seven easy steps, you'll have taillights with crystal clear visibility:
- Step 1: Disconnect the vehicle battery and unmount the headlight assembly. Use a ratchet to wrench out the bolts and screws on the taillights.
- Step 2: Detach the bulbs by rotating the rubber housing seal cap. After detaching the bulb carefully, drain the water.
- Step 3: You need to create a mildly heated atmosphere to dry out the light housing. To make this, you can use a cardboard box and carve a hole that can fit the hairdryer nozzle. Make sure to avoid any holes and gaps around the box.
- Step 4: Place the taillights inside the cardboard box. The taillights should face the bulb hole.
- Step 5: Direct exposure to hairdryer heat can hamper the taillights. It would be best to place a piece of cardboard with a hole between the light and the dryer.
- Step 6: Insert the nozzle and close the box. Operate the hairdryer at the minimum setting. Leave the hairdryer for 5 mins to dry the taillights.
- Step 7: Carefully take out the lights as they might be hot. After taking it out, mount the lights back to their position. If you think the process is tedious, you can use the hairdryer directly on the taillights.

Photo Credit: wallpaperscraft.com
With these simple steps and tricks, you can get rid of the moisture from the headlights and taillights. Safe driving!
Latest News
 Jaiveer Mehra | Feb 5, 2026Honda Dio 125 X-Edition, Shine 125 Limited Edition LaunchedBoth special editions get a variant-specific colour scheme and graphics.1 min read
 Seshan Vijayraghvan | Feb 5, 2026Tata Punch EV Facelift To Be Launched On February 20The electric version of Tata’s SUV-esque hatchback will be launched on February 20, 2026, and, like the petrol-powered version, it will receive a range of visual and feature upgrades.2 mins read
 Bilal Firfiray | Feb 5, 2026Hyundai i20 Line-Up Now Starts At Rs 5.99 LakhThree variants of the Hyundai i20 have received a price rejig – Era, Magna and Magna Executive.1 min read
 Jaiveer Mehra | Feb 5, 2026New Mercedes-Benz V-Class India Launch On March 3The V-class is set to return to the Indian market in Extra Long Wheelbase guise and is likely to be a CBU import.2 mins read
 Seshan Vijayraghvan | Feb 4, 2026Skoda Kylaq Crosses 50,000 Units Sales MilestoneThe Kylaq has been the brand’s best-selling car, which has led to Skoda Auto India’s best-ever sales performance in 2025.1 min read
 Seshan Vijayraghvan | Feb 4, 2026Volkswagen Tayron R-Line’s Pre-Bookings Open For Rs. 51,000Customers can pre-book the SUV for a token of Rs. 51,000; however, the price announcement will take place sometime later in February 2026.1 min read
 Bilal Firfiray | Feb 4, 2026Volkswagen Tayron R-Line Review: Sensible Flagship For IndiaVolkswagen has introduced a made-in-India flagship SUV that offers space, comfort, performance, and German driving finesse in a practical three-row package. But is the Tayron R-Line good enough?6 mins read
 Preetam Bora | Feb 2, 2026TVS NTorq 150 Road Test Review: Bigger, Better & More Efficient!We test the new TVS NTorq 150 out in the real world to get a sense of what it offers in terms of performance, dynamics and fuel economy.7 mins read
 Bilal Firfiray | Jan 21, 2026Tata Punch Facelift Review: New Turbo Engine; Same Old SoulWith the update, the Tata Punch facelift retains its character of being a healthy runabout, which is perfect for Indian roads. But have these changes made it any better?7 mins read
 Amaan Ahmed | Jan 17, 2026Bajaj Chetak C25 First Ride Review: Basic, Likeable E-Scooter For First-Time RidersThe Chetak C25, in quite a few ways, is poles apart from the larger and more powerful 30 and 35 Series models, but in its mannerisms, it is very much a Chetak.8 mins read
 Bilal Firfiray | Jan 9, 2026Toyota Urban Cruiser Hyryder: 10,000 km Long-Term ReviewAfter spending over three months and 10,000 km with the Toyota Urban Cruiser Hyryder Hybrid, we were impressed by its real-world mileage, seamless hybrid, practical comfort, and Toyota reliability. Is it the best C-SUV then?5 mins read


